 |
| New Motor, Gearbox, Prop and Spinner From Horizon Hobby |
 |
| New Motor and Gearbox Ready for Installation |
 |
| Fuselage Access |
Once you have access to the motor area you again take you Xacto knife and cut along the foam at along the areas shown in red below to separate the caulking used to secure the gearbox in place. You will also need to separate a couple of areas of caulking that secure the wiring.
Once you have the gearbox, motor and wiring separated from the caulking, you will need to unplug the motor wires from the rear of the receiver. Note that the white wire is inboard and that the plug uses the out board two pins. Be sure to use tweezers to unplug the JST plug. Don't pull on the wires to remove the plug as this can break the wiring to the plug.
 |
| Photo shows the two pronged male plug removed from the reciever |
 |
| Old Motor removed from the fuselage |
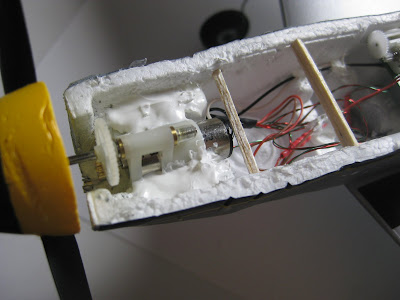
Put a second layer of caulking over top of the gear box flanges Allow the caulking to dry at least 24 hours before starting up the motor or putting any strain on the power system. The additional wires you see in the photos are for the navigaional lights that I added. The balsa cross members are an attempt to reinforce a badly deformed fuselage nose.
All that's left to do is put the fuselage top back on, secure it with a few pieces of Scotch tape and your motor replacement is finished.
Tags:Parkzone P51 Ultra Micro, RC, Radio Control, Airplane, Hobby


Thanks! Very helpful. I just finished replacing my motor to try to fix the pulsing it started doing, even with new batteries. The plane flies great now. Question: What adhesive caulk do you use? I used Gorilla glue, which foams up and then can be worked when cured.
ReplyDelete